Welcome to part two of my introduction series. When you fly over the app description and look at the first screenshot, you can easily get the impression that SnipNotes is just a widget. Way off the mark! SnipNotes features a full-fledged main app, where you can manage your snippets and do so much more. Let’s take a look.
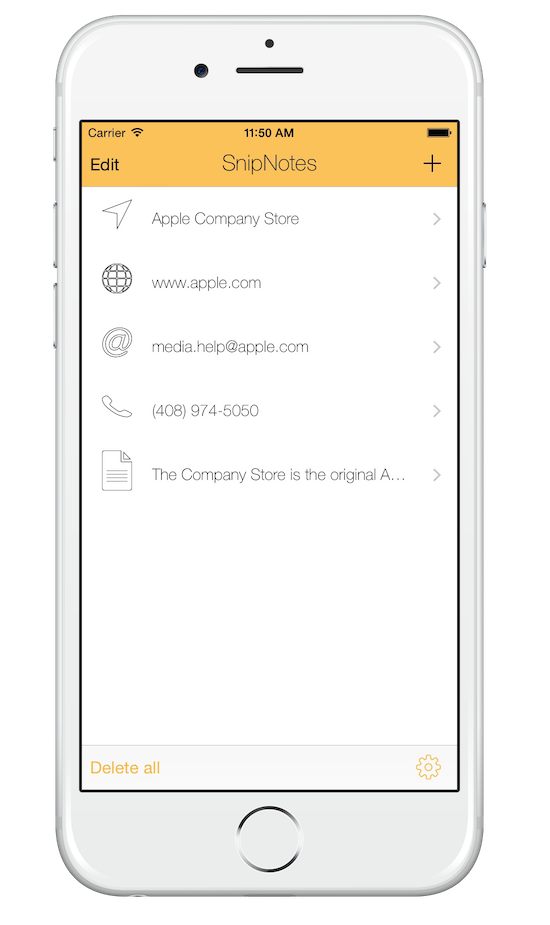
 The app’s start screen looks quite similar to the widget. It contains a list of all your snippets and displays an appropriate icon next to every entry. Swipe left on an entry to copy its content into clipboard, mark it as favorite (more on this later) or delete it. There are four buttons on this screen, one in every corner:
- You can tap on “Edit” to sort your snippets in a custom order
- There is a “Delete all” button, which does what the name suggests
- Tap on the litte cogwheel icon to open the settings menu
- Tap on “+” to create a new snippet manually
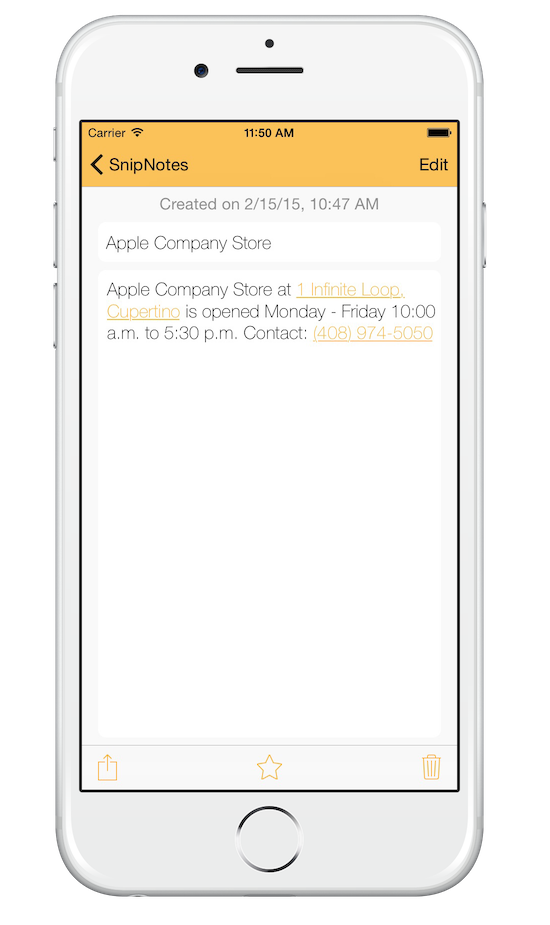
 When you tap on an existing snippet or manually create a new one, the snippet’s detail screen appears. From here you can view and edit its complete content. Notice the yellow underlined parts of the text? Similar to the widget, the app analyzes your content and allows you to tap on recognized text for quick actions. Tap on a phone number to call it, tap on an address to open it in maps etc.
Above the content field is the snippet’s title. If you set it, the snippet list in the main app and the widget will show it instead of the content field. Use it to quickly recognize your snippets in a big list.
From this screen you can also mark your snippet as a favorite, delete it and share it to other apps.
 Go back to the main screen and tap on the little cogwheel to open the settings menu. This is the place where you can customize SnipNotes and its widget to suit your needs:
Main App
- New snippets will show up at the top of your list by default. You can append them at the bottom instead.
- SnipNotes stores your snippets in your private iCloud account by default. But you can also disable iCloud storage completely.
Widget
- By default the widget shows the current content of your clipboard. You can disable this label, e.g. if you often store passwords in your clipboard
- You can disable context specific actions in the widget
- You can configure the widget to only show your favorite snippets. This is especially useful if you have a very large list of snippets and don’t want every new snippet to appear in the widget automatically. With this mode enabled, you can still add snippets to your list directly from the widget. Simply long tap on the widget’s “Save” button to save and favorite a snippet at the same time.
On this page, you can also request support by mail and rate SnipNotes on the App Store. The “About” page holds some additional information about SnipNotes like its privacy policy and internet links.
Sounds interesting? SnipNotes is available on the Apple App Store for just 99 cents.
In the next post I will talk a little more about some typical use cases and how SnipNotes can help you with them. Thanks for reading and stay tuned!
Next article in this series: Putting SnipNotes to practical use